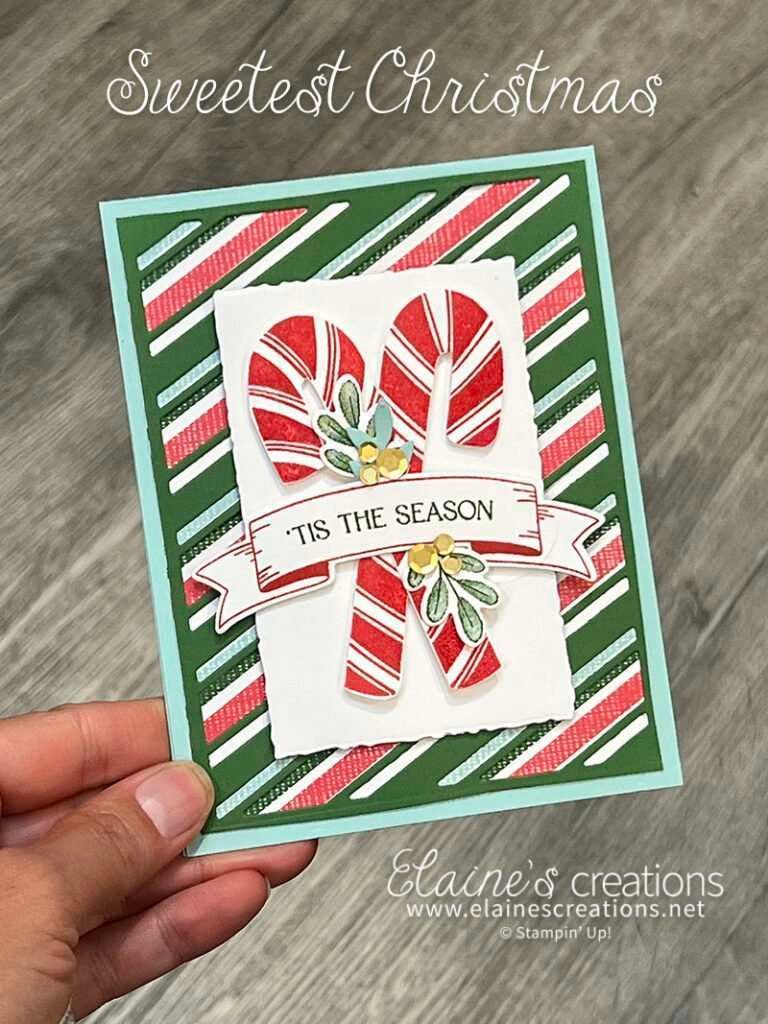
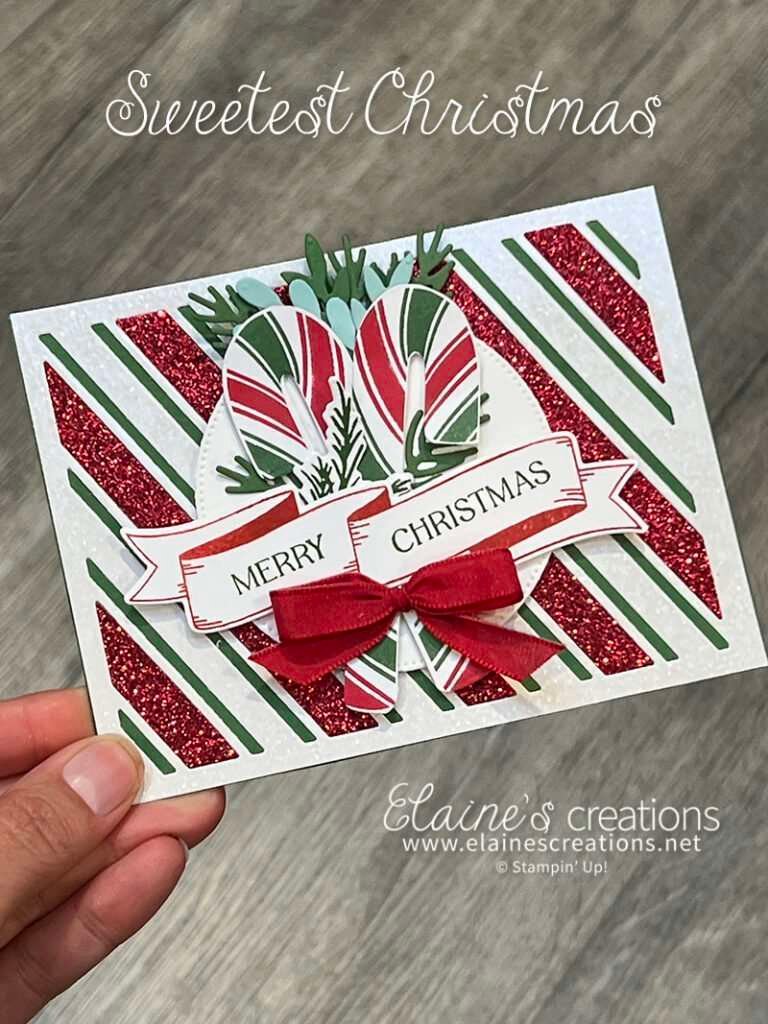
New Clearance Rack items added!
New items were added the to Clearance Rack! Hurry and get them now before they are gone! Only available until supplies last! Click on a product below to purchase:
This witch’s legs swing back and forth, tick tock, like a clock! The Bewitching stamp set and Witch Hat Builder Punch are perfect for making this fun Halloween Card. Just add a brad to the top of the legs to allow them to swing freely back and forth. Add color to the Black & White…
Pull the top on this double slider card to reveal a witch’s hat to go with her legs! They are reunited using the Bewitching stamp set and the Witch Hat Builder Punch! The Celebrate Everything Designer Series Paper has some fun Halloween designs that I used for this card. I used the thinnest Stitched Rectangle…
Create a fun Halloween gift card card with the Bewitching stamp set and the Witch Hat Builder Punch! I thought it would be fun to attach the Witch legs to the gift card to help pull out the gift card. And the Mini Pocket Envelope dies are a perfect size for gift cards! Here is…
Create a spooky silhouette Halloween card with the Scary Cute stamp set and Scary Silhouettes Dies. Use Blending Brushes and Gorgeous Grape and Parakeet Party to create the background color. To get a deep black color, use the stamparatus to stamp the silhouettes with Memento Black ink several times. Add a spooky house, a spooky…
Double your fun with this Halloween double card created with the Scary Cute stamp set and Scary Silhouettes Dies. Use two cards to make one double card. Cut the second card to 10-1/2″ x 4″ and score at 2-3/8″ and 5-1/4″. Decorate with the Black & White Designer Series Paper and add some trick or…
Here is a fun Halloween shaker card created with the Scary Cute stamp set and Scary Silhouettes Dies. Stamp the bats on the card front and then use the fourth largest Layering Diorama Dies to cut the middle. Add a window sheet to the back, then Foam Adhesive Strips around the opening on the back….
Have you ever tried partial embossing a card? It’s as easy as creating your own “cutting plate” out of cardboard. Just save a piece of cardboard that comes with any Paper Pumpkin kit, some of the Designer Series Papers, or wherever else you can find some that are about the same thickness as one of…
I love making shaker cards! They are so fun! I used the largest circle from the Stylish Shapes dies to cut the circle opening. Next, I used the Wintry embossing folder to emboss the Basic White card stock. Then I adhered a Window Sheet then Adhesive Foam Strips to the back. I adhered a piece…